First, diagnose it: what “bad” actually looks like
Bad photo engravings fail in a handful of recognizable ways. Match your result to a symptom and you already know where to look:
- Muddy gray mush — no clear darks or lights, the face reads as one flat tone. Cause: not enough contrast in the file, or a low-quality source photo.
- Too dark overall — the portrait sinks into the material. Cause: dark midtones in the image plus too much power; on wood, often an image that was never brightened for the material.
- Blown-out highlights — forehead and cheeks are empty white patches with no detail. Cause: overexposed source or over-aggressive manual contrast pushing.
- Missing eyes — the most painful one on portraits. Cause: shadows around the eye sockets in the source photo that collapse to solid black once dithered.
- Face lost in background noise — trees, wallpaper or other people engrave at the same intensity as the subject. Cause: nobody removed the background.
- Grainy static over everything — dithering dots that read as noise instead of tone. Cause: dithering applied to a photo that was never cleaned up.
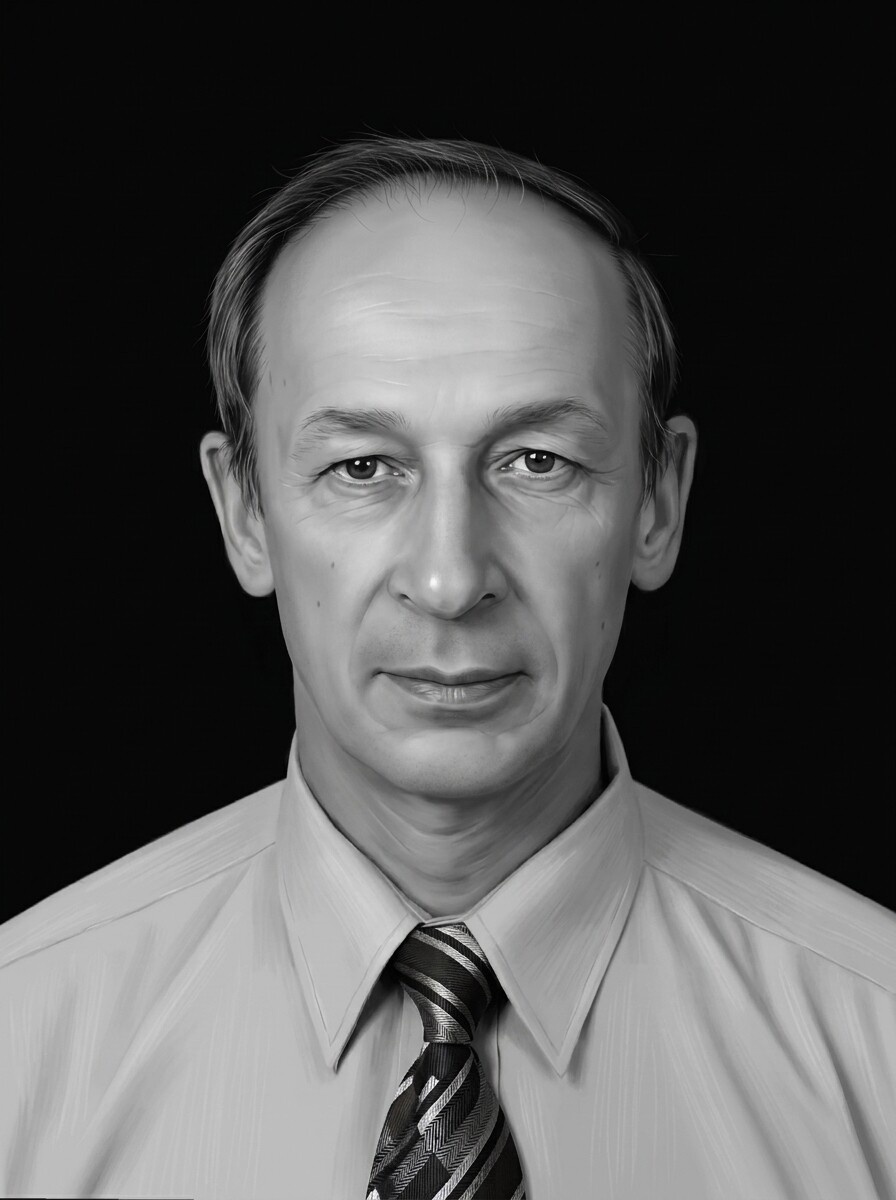
 Before
 After
After
Cause 1. The source photo was never good enough (the big one)
This is the root of most bad photo engravings, and the one that no laser setting can compensate for. A compressed WhatsApp forward, a tiny crop from a group shot, a faded print photographed under a kitchen lamp — these files simply do not contain the facial detail a laser needs. The machine faithfully reproduces what you feed it. Feed it mush, get engraved mush.
Customers rarely bring good files. If you run an engraving business, you already know the routine: the only photo of grandpa is a 40-year-old print with a crease across his face, or a 300-pixel avatar. The temptation is to sharpen it, crank the contrast and hope. That does not work, because sharpening cannot invent detail that is not there — it only makes the noise crisper.
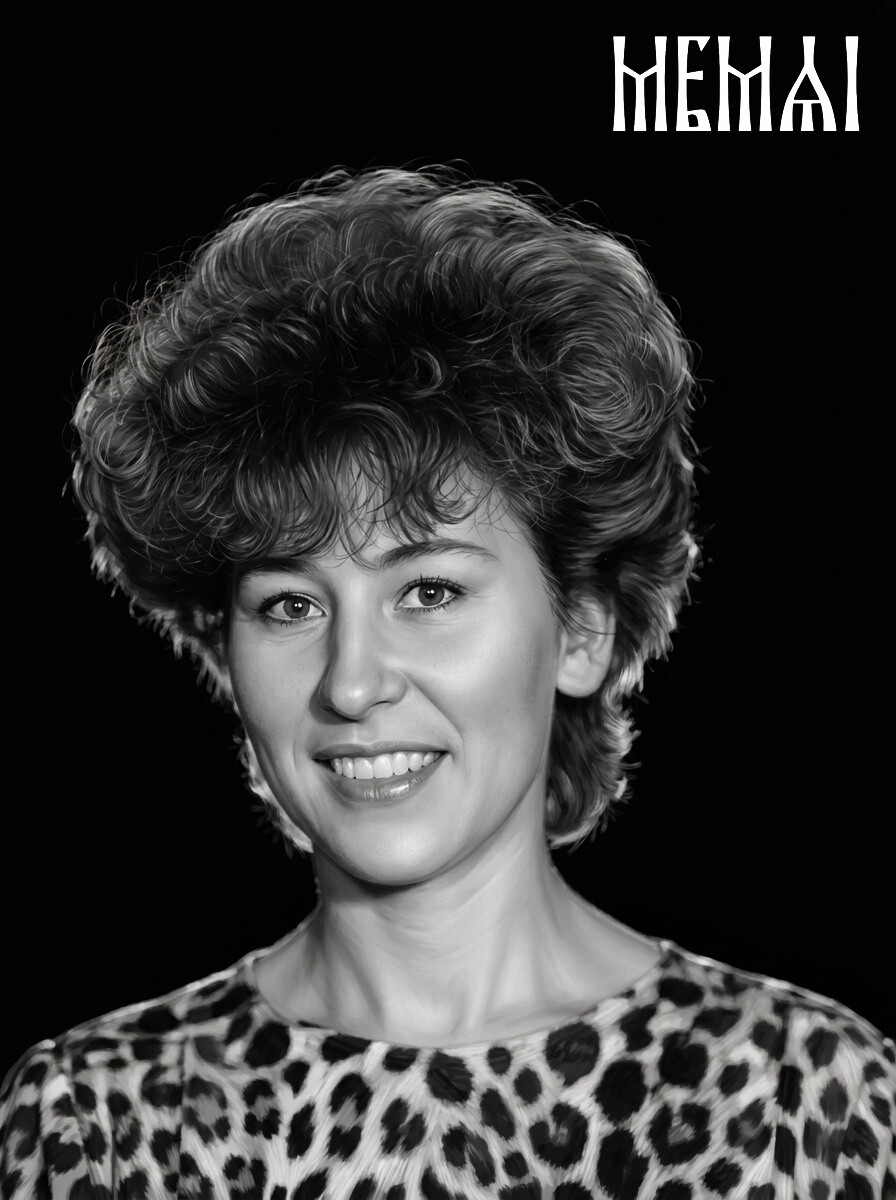
What actually works is restoration and retouching before any engraving prep: rebuilding facial detail, repairing damage, evening out the lighting, and doing it in a way that keeps the person recognizable. That last part matters most on memorial and headstone portraits, where the family will compare every millimeter of the result against their memory of a loved one. Generic “AI enhancers” built for social media tend to produce a glossy, beautified stranger; engraving prep needs the face kept true.
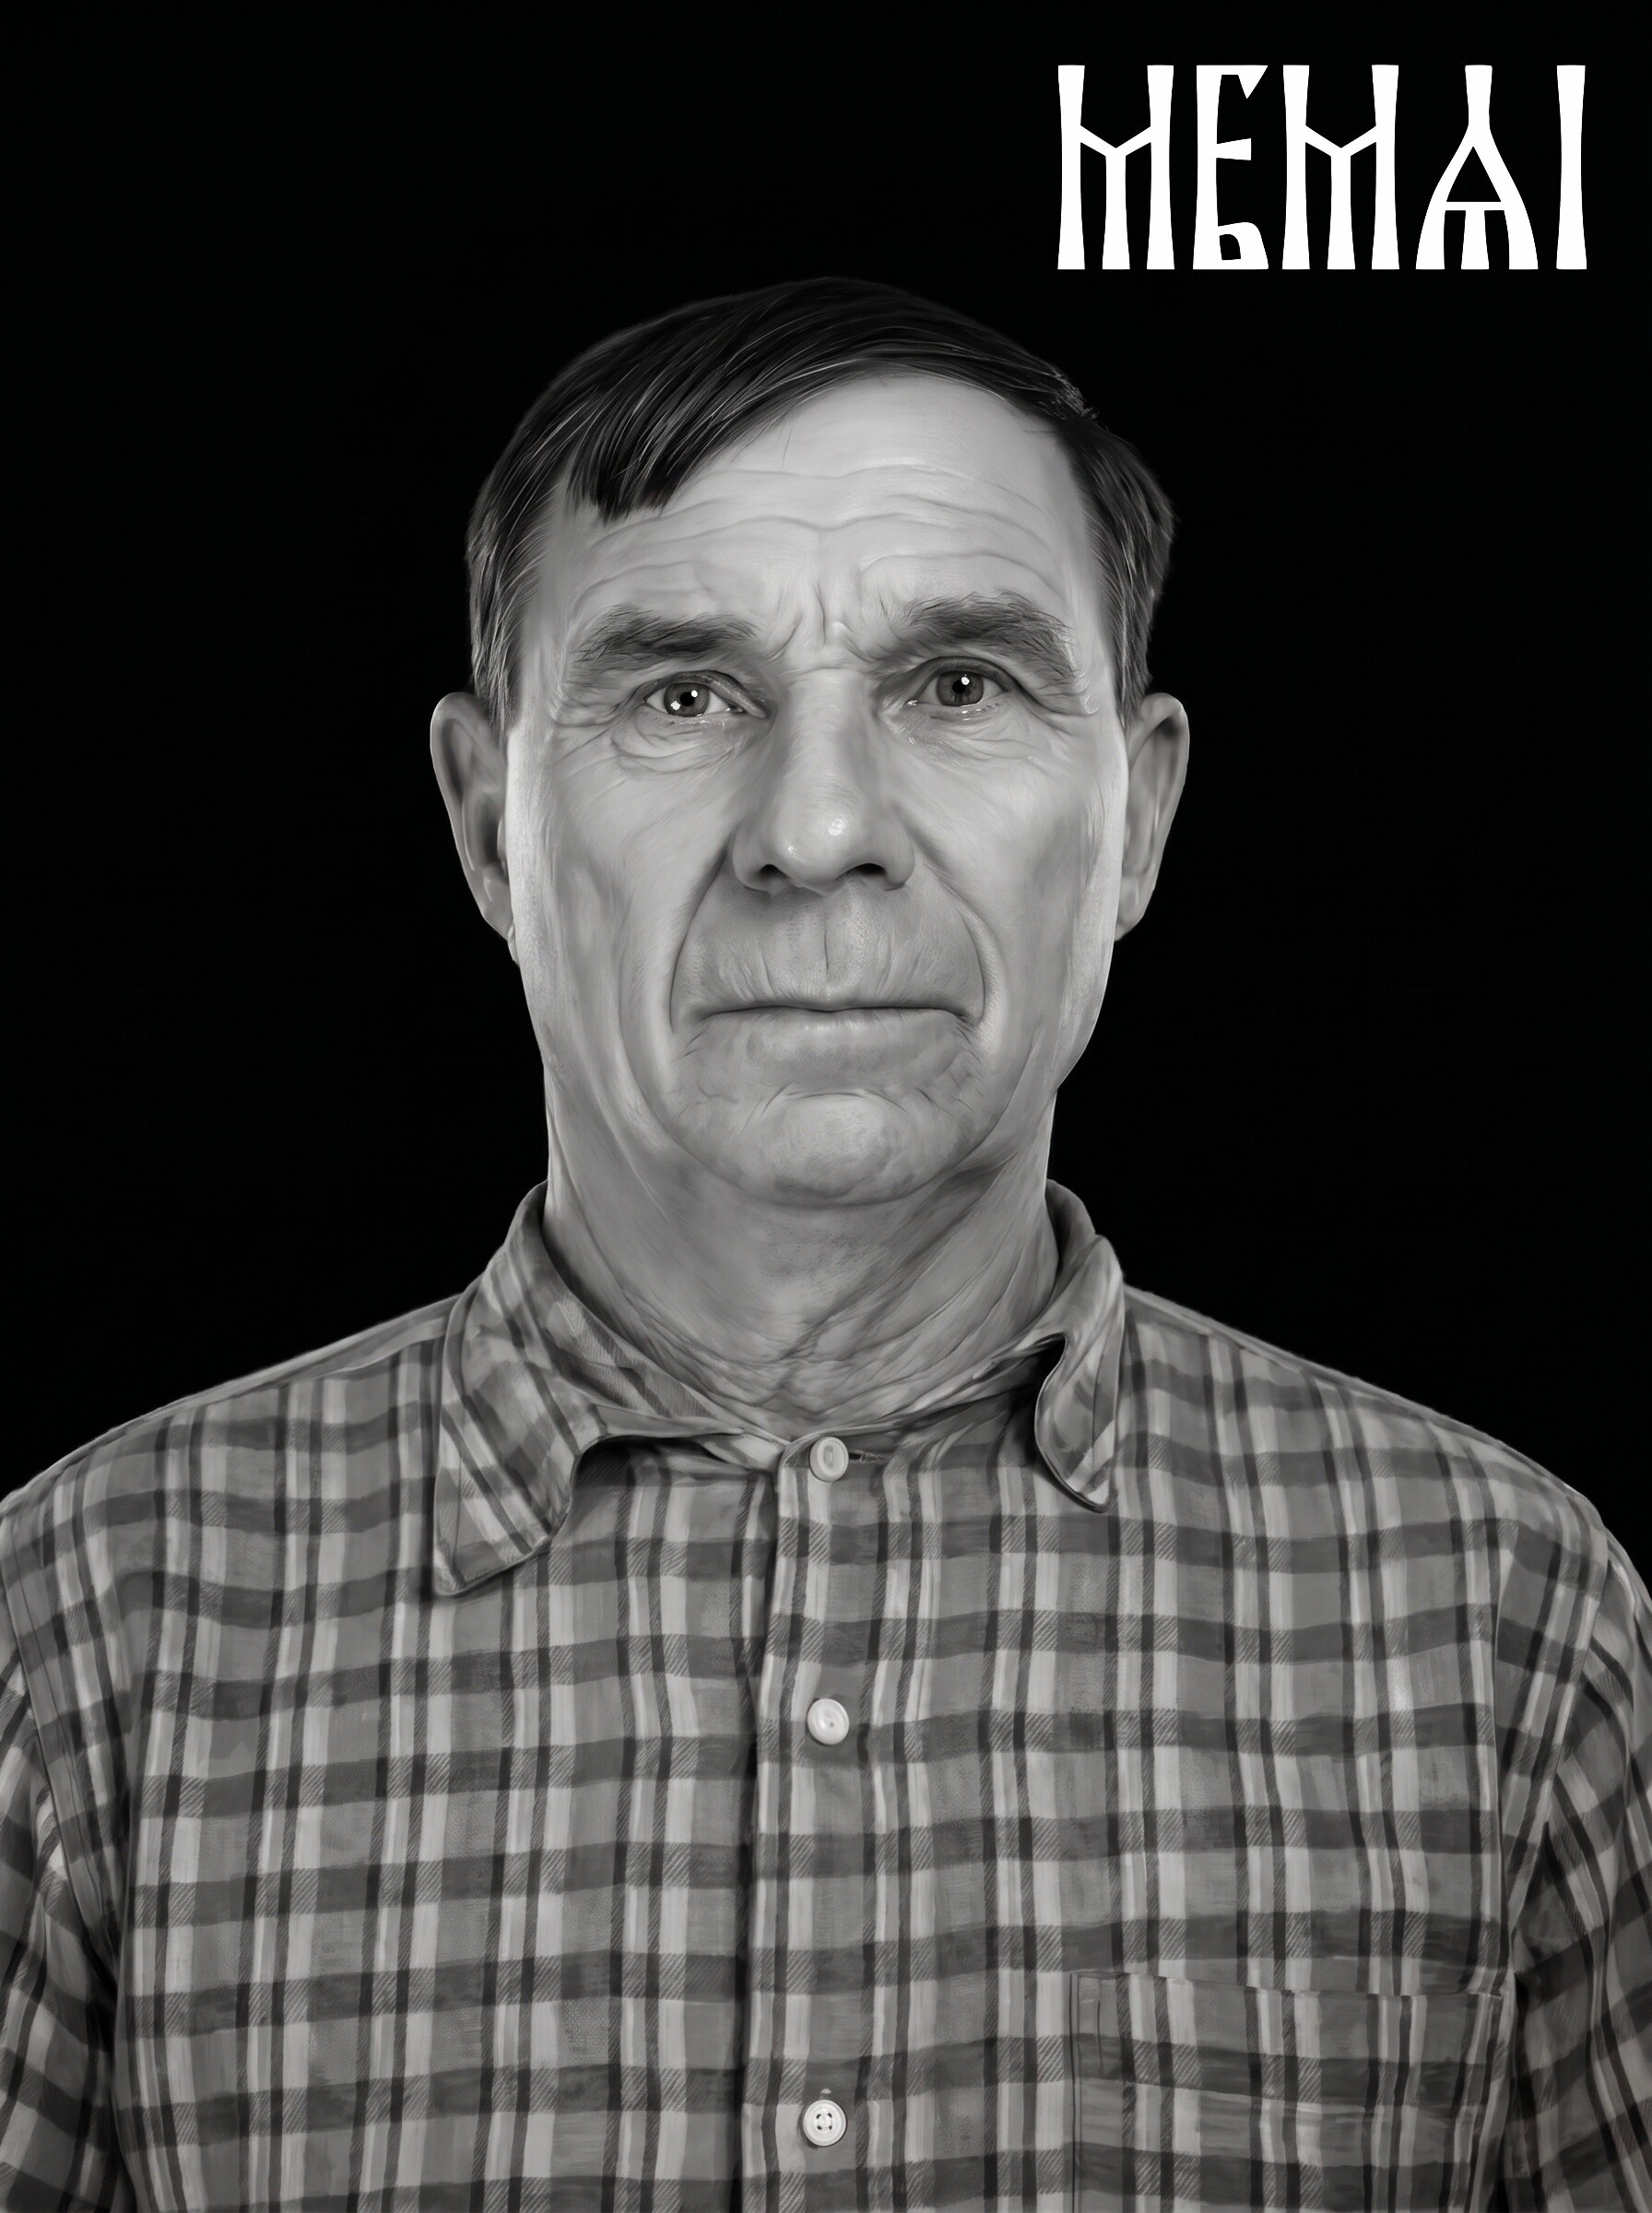
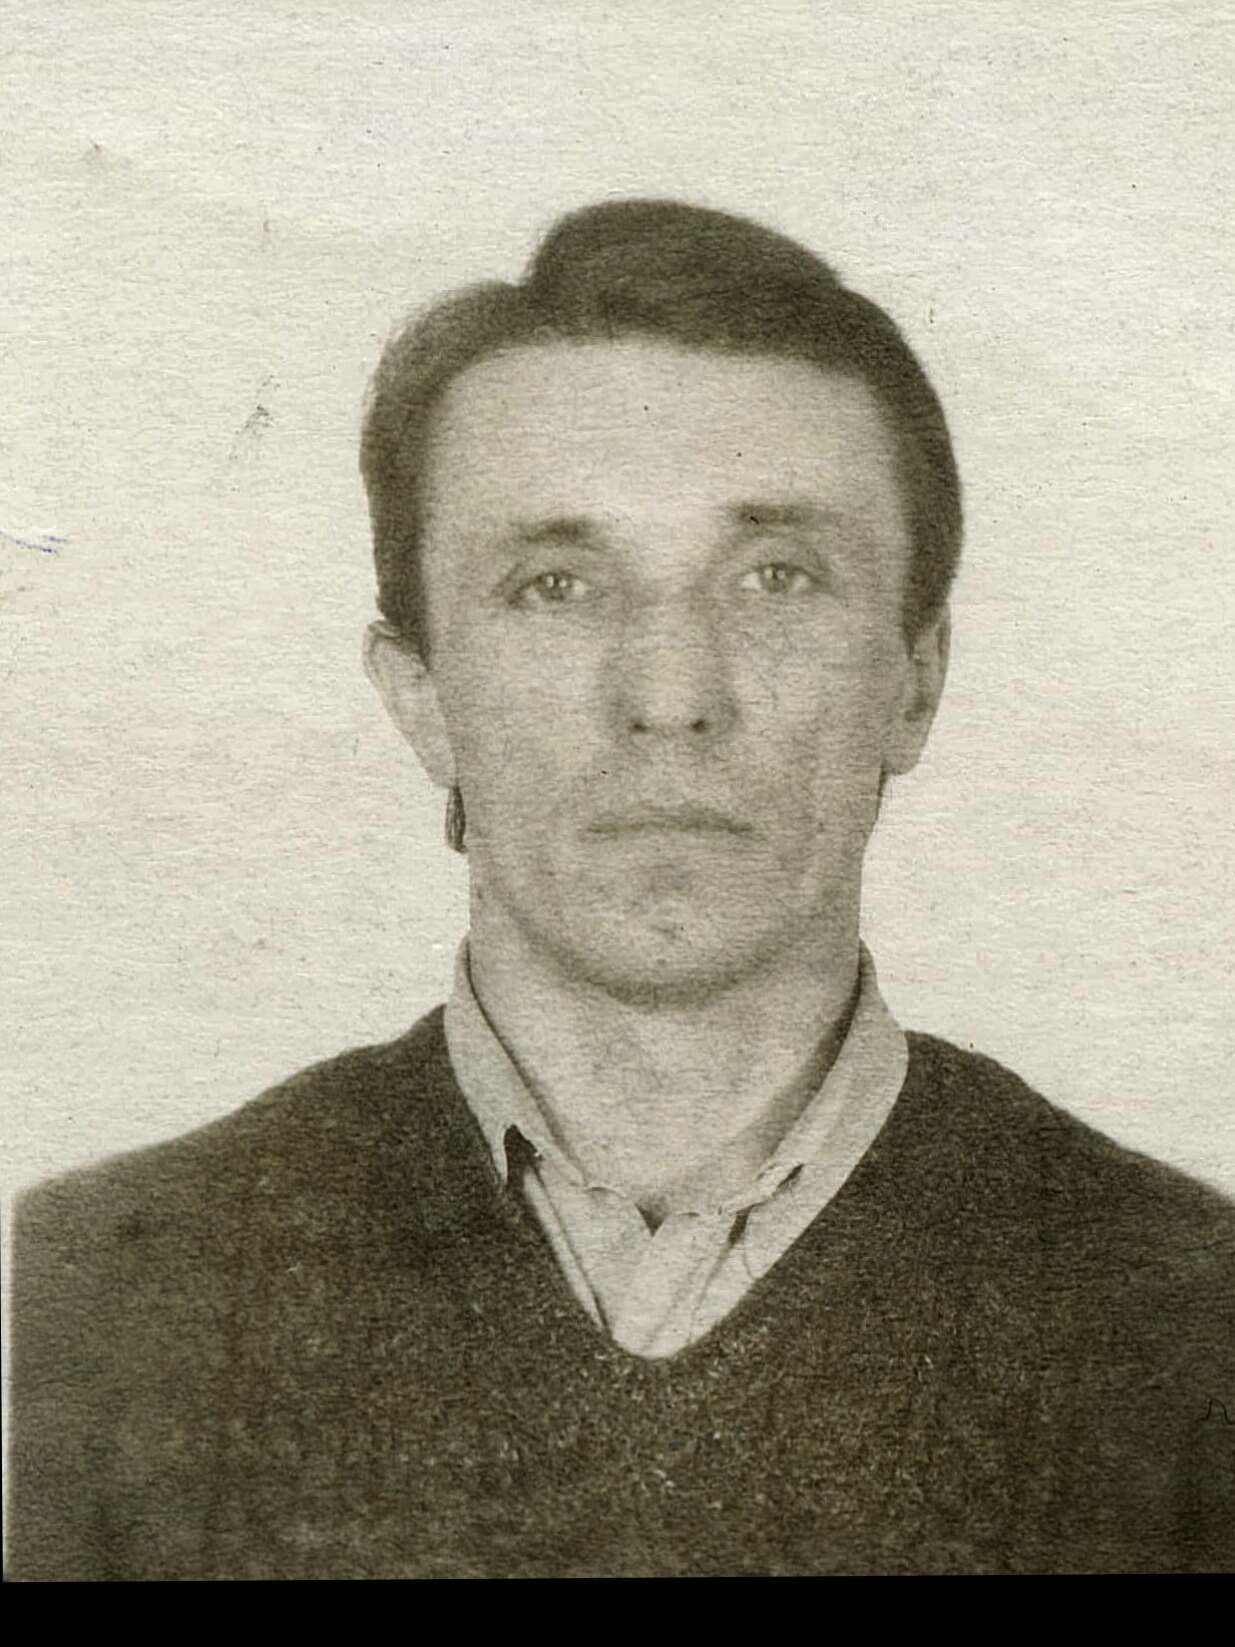 Before
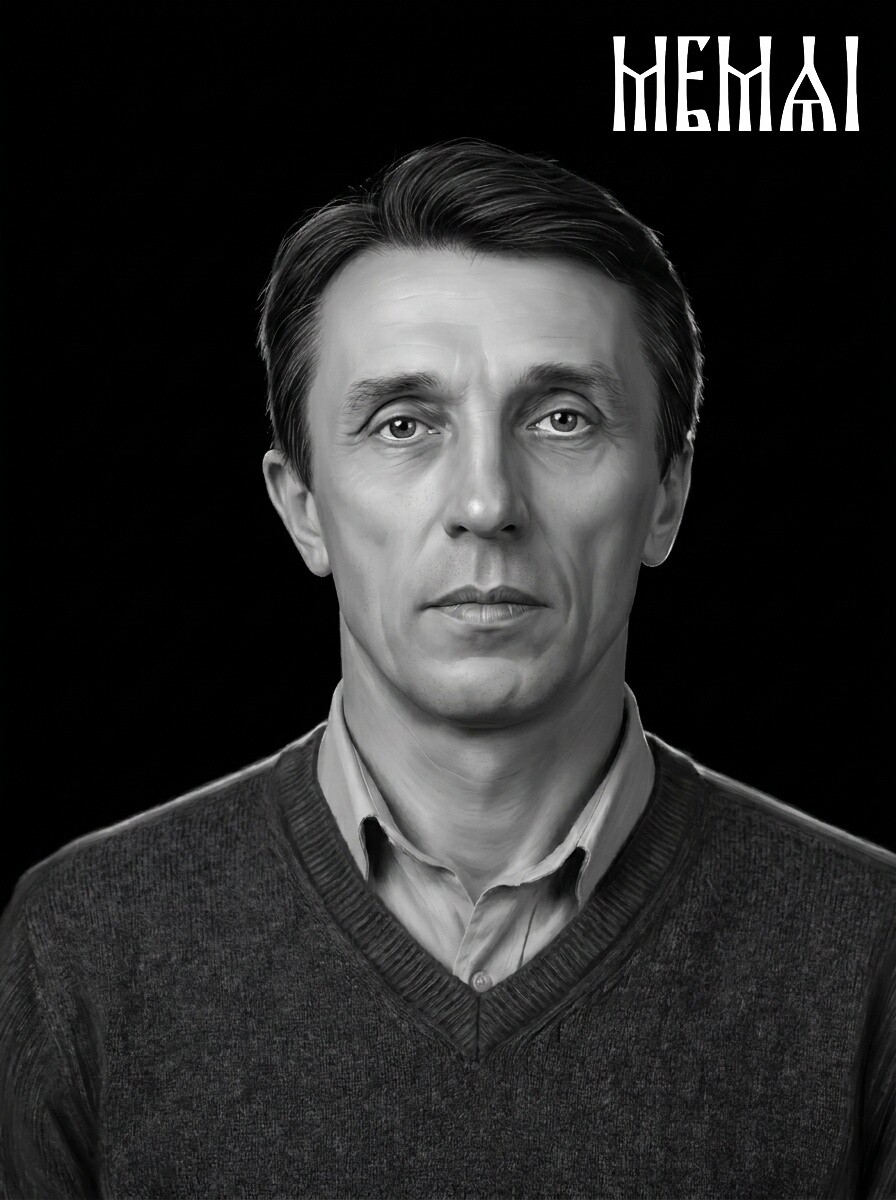 After
After
Cause 2. Wrong contrast for the material
A photo that engraves beautifully on black granite will look terrible on maple, and vice versa — because the two materials work in opposite directions. On dark materials (black granite, slate, powder-coated tumblers) the laser mark is lighter than the surface: highlights get engraved, shadows stay untouched. On light materials (wood, light acrylic) the mark is darker: shadows get burned, highlights stay blank.
Two practical consequences:
- For dark materials the image usually needs to be inverted (negative) before engraving — forgetting this step is a classic first-timer failure on granite and tumblers.
- The tonal curve must be tuned per material. Wood compresses midtones as the burn spreads, so photos for wood need brighter mids and stronger separation — we cover that in the wood engraving photo prep guide. Curved stainless tumblers have their own quirks, covered in the tumbler engraving prep guide.
If your engraving came out as a ghostly negative, or every face looks like it was photographed at night — contrast direction and tone curve are where to look.
Cause 3. A busy background is eating the face
The laser gives every pixel equal priority. If the portrait still has a background — foliage, curtains, a patterned sofa, other people's shoulders — all of that texture engraves at full detail and competes with the face. At typical portrait sizes (3–8 inches) the viewer's eye cannot separate subject from noise, and the whole piece reads as clutter.
Background removal before engraving fixes this instantly: the face gets all the tonal range, the surrounding material stays clean, and the portrait gains that professional “floating” look you see on well-made memorial plaques and photo gifts. A soft halo or vignette around the subject is a nice optional touch on dark materials.
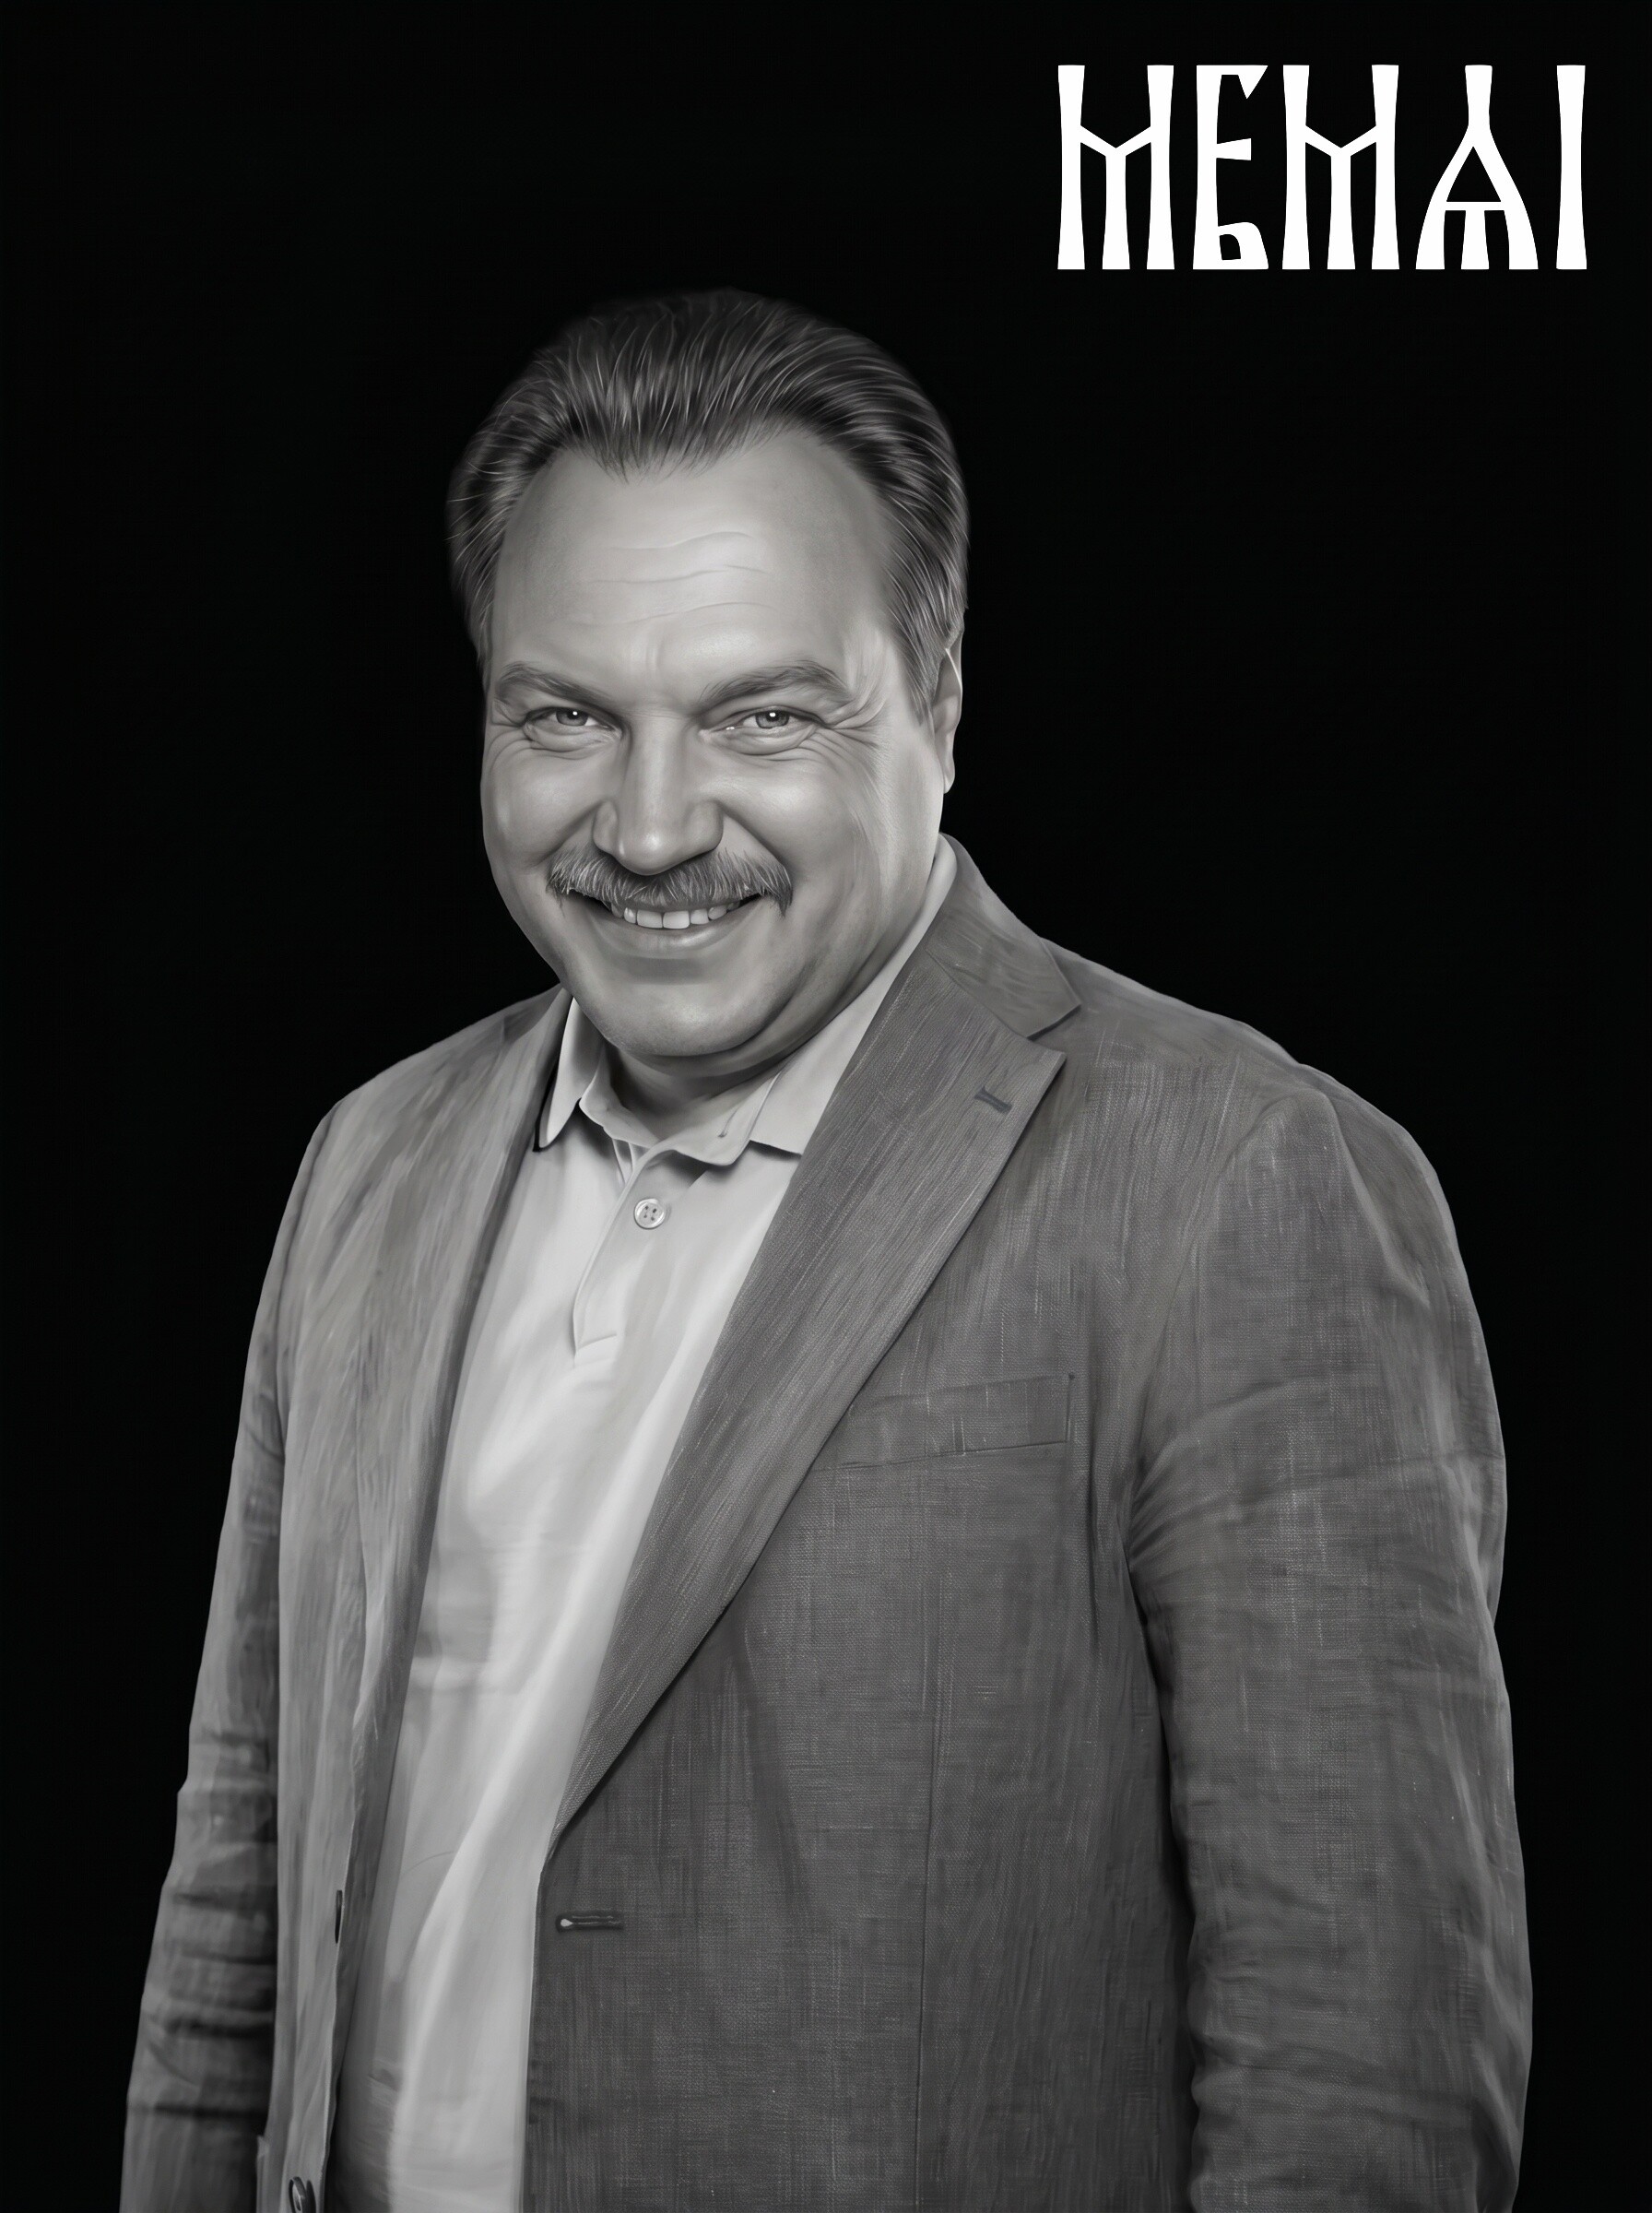
 Before
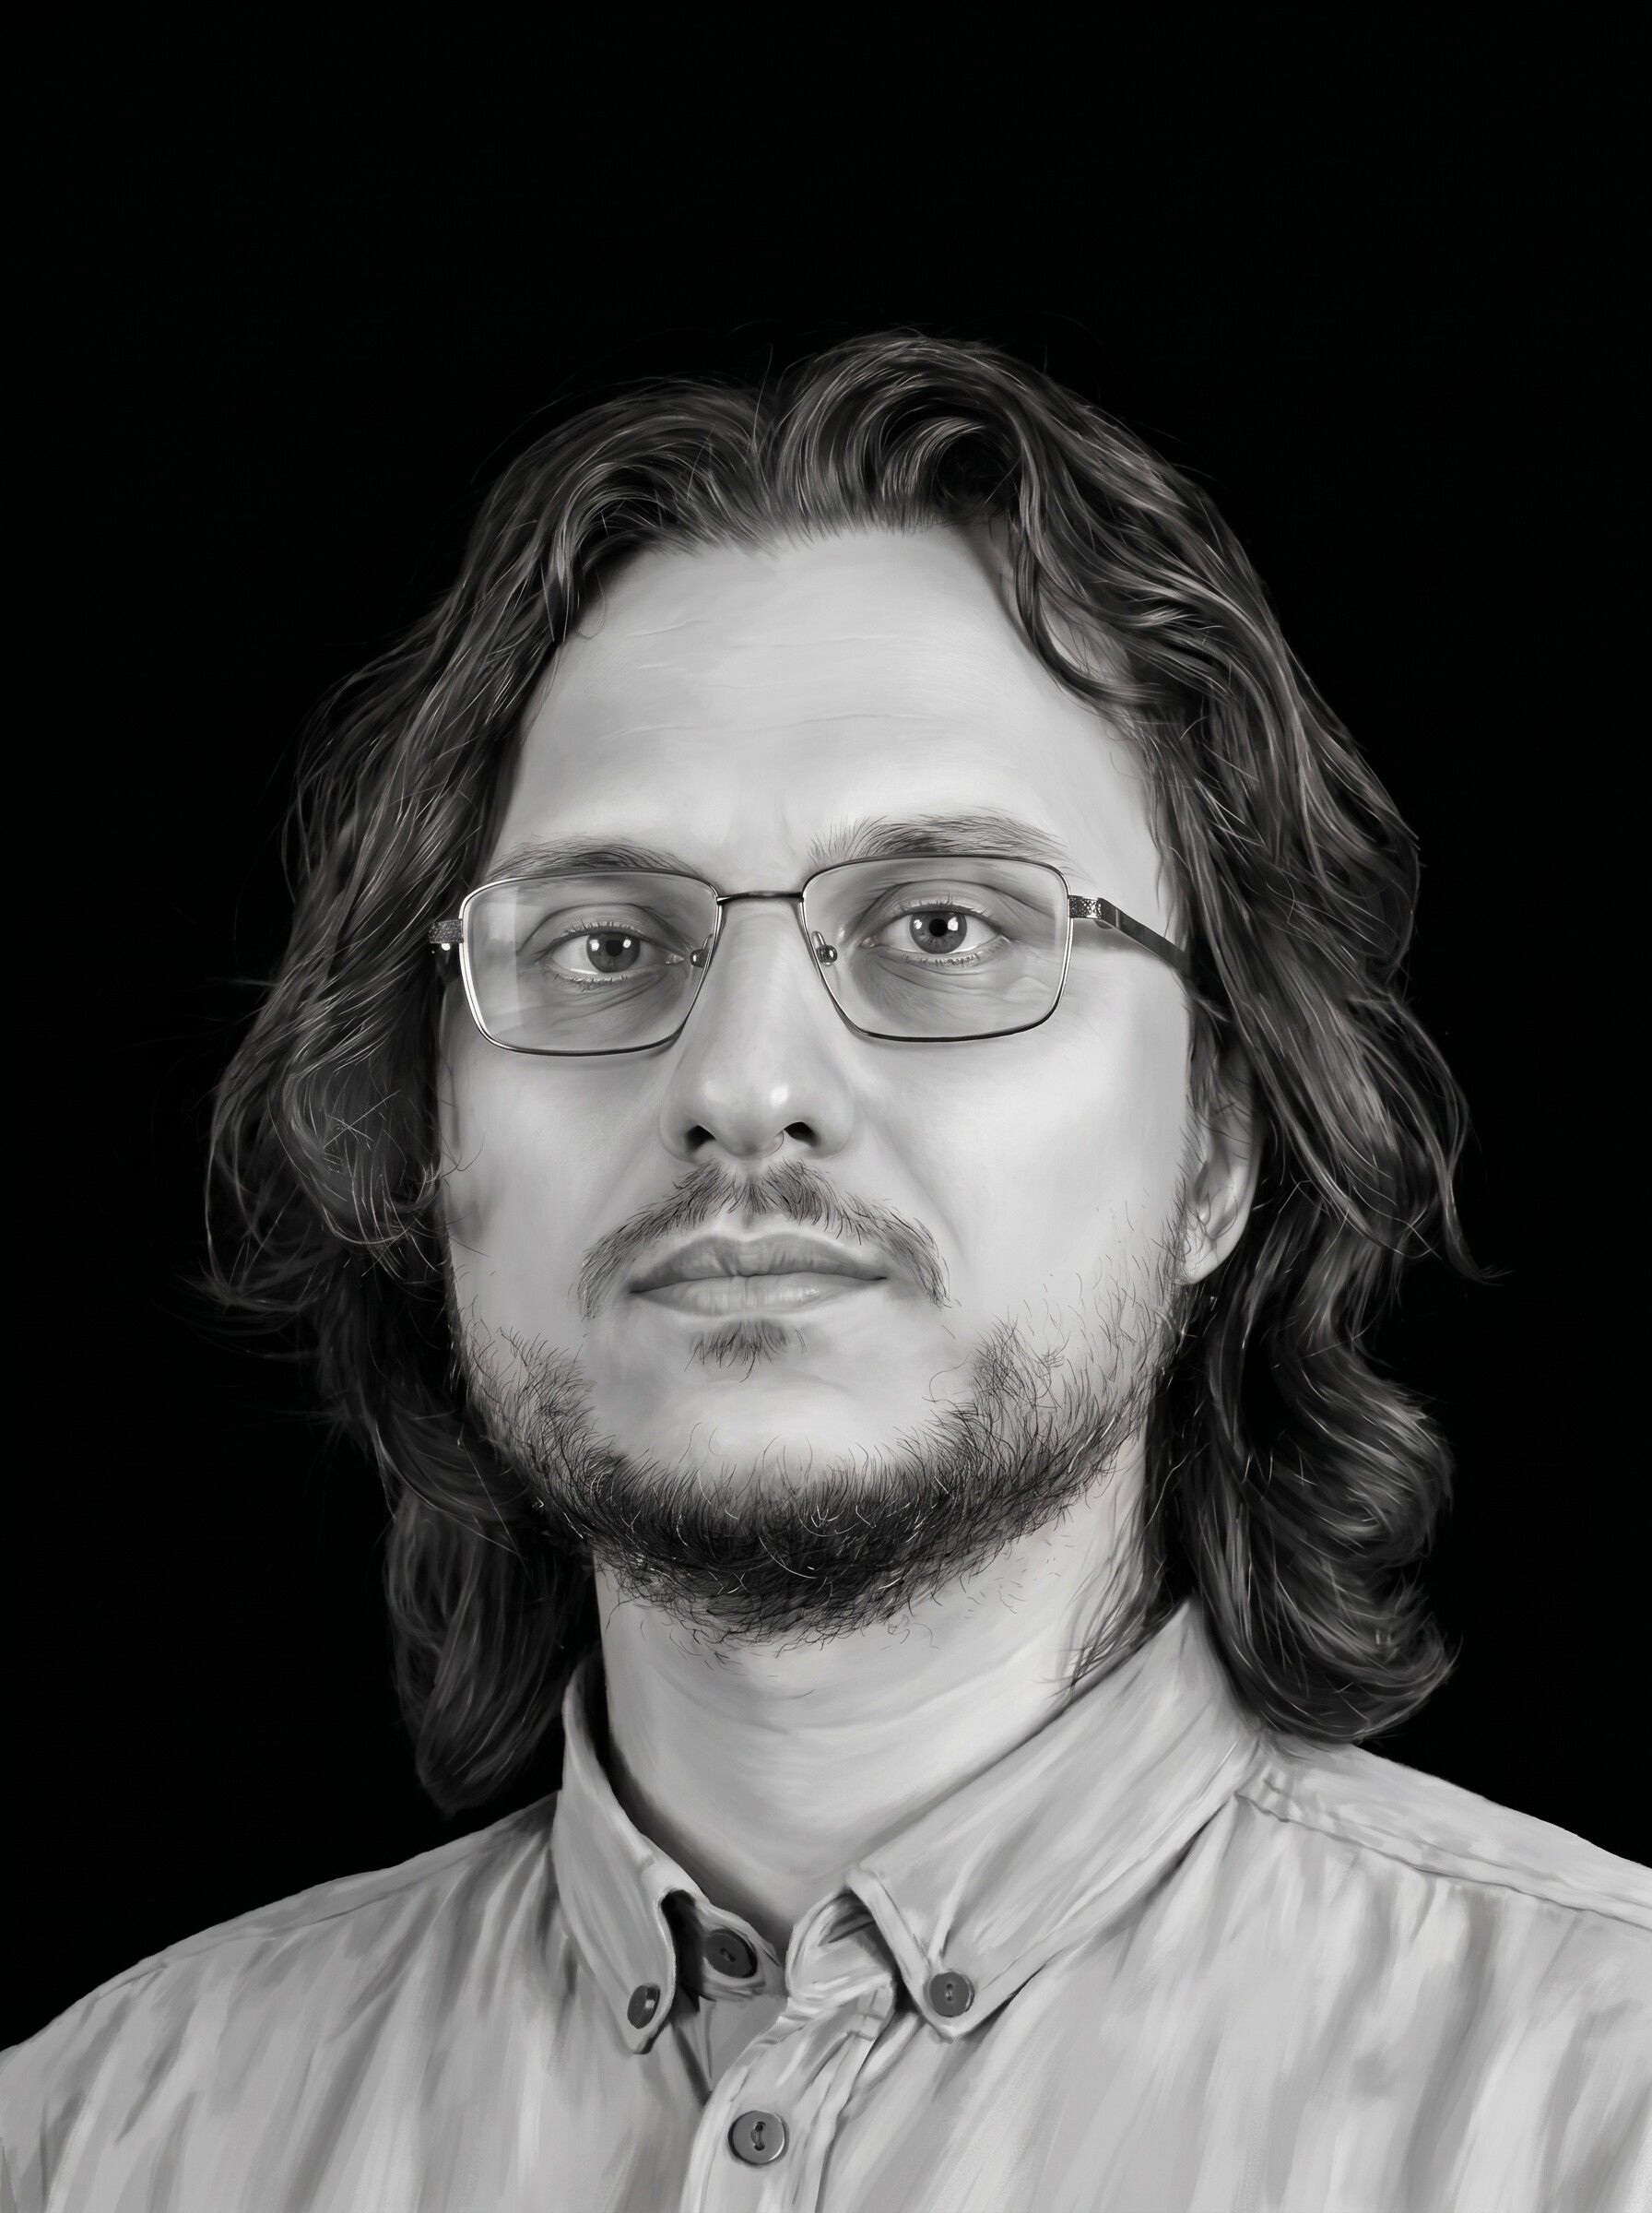 After
After
Cause 4. You dithered a bad photo — and got organized noise
This is the trap most DIY tutorials lead you into. LightBurn, ImagR and similar tools offer dithering algorithms — Floyd–Steinberg, Jarvis, Stucki — that convert grayscale into the 1-bit dot pattern a laser needs. They work, and arguing Jarvis vs. Stucki is a legitimate hobby. But here is the thing the tutorials skip: dithering is the last step of photo prep, not a substitute for it.
A dithering algorithm does not repair a face, remove a background, fix flat contrast or recover a blurry eye. It just translates whatever tones exist into dots. Dither a muddy photo and you get perfectly calculated, evenly distributed mud. That is why you can try all five algorithms in LightBurn, tweak DPI for an evening, and every version of the same weak photo still looks bad on the material.
The right order of operations:
- Restore and retouch the photo — detail, damage, lighting, identity.
- Remove the background, isolate the subject.
- Set contrast for your material (invert for dark surfaces).
- Then dither in your machine software, with whichever algorithm you prefer.
Get steps 1–3 right and the choice of algorithm in step 4 becomes pleasantly unimportant — a clean, high-contrast portrait survives any of them.
Try it free — first photo on us
Upload your problem photo and get a machine-ready portrait in about 5 minutes: AI restoration, retouching and background removal in one pass. No Photoshop, no signup — see the result before you decide.
Fix my photo freeCause 5. Material and machine settings (the smaller factor)
Settings matter — just less than the image. If the file is good and the result still disappoints:
- Resolution mismatch. Engraving at 300+ DPI from an image that only holds 100 DPI of real detail at your output size produces soft mush. Check the pixel dimensions against physical size — our complete photo prep guide has the numbers.
- Too much power / too slow. Overburn fills in the gaps between dither dots and the image goes dark. Photos generally want fast and light, not deep.
- The material itself. Heavy wood grain, knots, low-grade granite with light speckling, cheap coated tumblers with uneven coating — all of them fight the image. Test on the actual material, not a lookalike.
- Focus and lens condition. A slightly out-of-focus beam or dirty lens blurs the dot pattern that photo engraving depends on.
Run a small grayscale/dither test grid on scrap of the same material before committing a finished blank — ten minutes that saves both material and pride.
The fix-it checklist
Next time an engraved photo comes out bad — or better, before it does — walk this list top to bottom:
- Judge the source honestly. Is the face sharp, evenly lit, big enough in the frame? If not, no settings will save it — the photo needs restoration first.
- Restore and retouch. Rebuild detail, repair damage, balance the light, keep the likeness true. This is exactly what our AI pipeline does automatically in ~5 minutes.
- Remove the background so the laser's tonal range goes to the face.
- Adapt contrast to the material — brighter mids for wood, inverted for granite, slate and dark tumblers.
- Size the file for the job: physical output size at 300+ DPI, no upscaling of tiny sources.
- Dither last — Jarvis or Stucki for smooth portraits, Floyd–Steinberg if you want slightly crisper micro-detail.
- Test on scrap of the same material, adjust power/speed, then run the real piece.
Steps 2–4 are the ones most hobbyists skip, because doing them by hand takes Photoshop skills or a paid retoucher with a day-long turnaround. That gap is exactly what an AI prep service closes: upload the original, download an engraving-ready file, drop it into LightBurn or your Glowforge/xTool app and dither as usual.
FAQ
Why does my laser engraved photo look muddy or too dark?
Almost always because the image had too many midtones going in. A laser can only mark or not mark each spot, so large areas of similar gray collapse into one dark smudge. Fix the photo first — raise facial contrast, brighten midtones, remove the background — and only then dither. If it is still dark, lower power or raise speed and re-test on scrap.
Can I fix a photo engraving after it has been burned?
On granite, slate and coated tumblers — no, the mark is permanent and the blank is lost. On wood you can occasionally sand back a very light burn, but that is the exception. The reliable fix is upstream: correct the image file, then engrave a fresh piece.
Which dithering algorithm is best — Jarvis, Stucki or Floyd-Steinberg?
Jarvis and Stucki are smoother and more forgiving for portraits; Floyd–Steinberg preserves a touch more fine detail but shows noise sooner. In practice the algorithm matters far less than the image quality. A restored, high-contrast portrait looks good with any of them; a weak source looks bad with all of them.
Do I need Photoshop to fix my photo before engraving?
No. Manual prep in Photoshop or GIMP works if you have the skills and the hours. An AI photo prep service does the restoration, retouching and background removal automatically in about five minutes in the browser — you download a machine-ready file and handle only the dithering and settings in your usual software.